Clinical instructions for recording a protrusive bite registration with the ArrowPath Sleep Airway Bite. To make an airway device you need to record the best jaw position for the airway and relate that position to the lab.
Before you begin — take a digital scan of the upper and lower jaws without a bite.
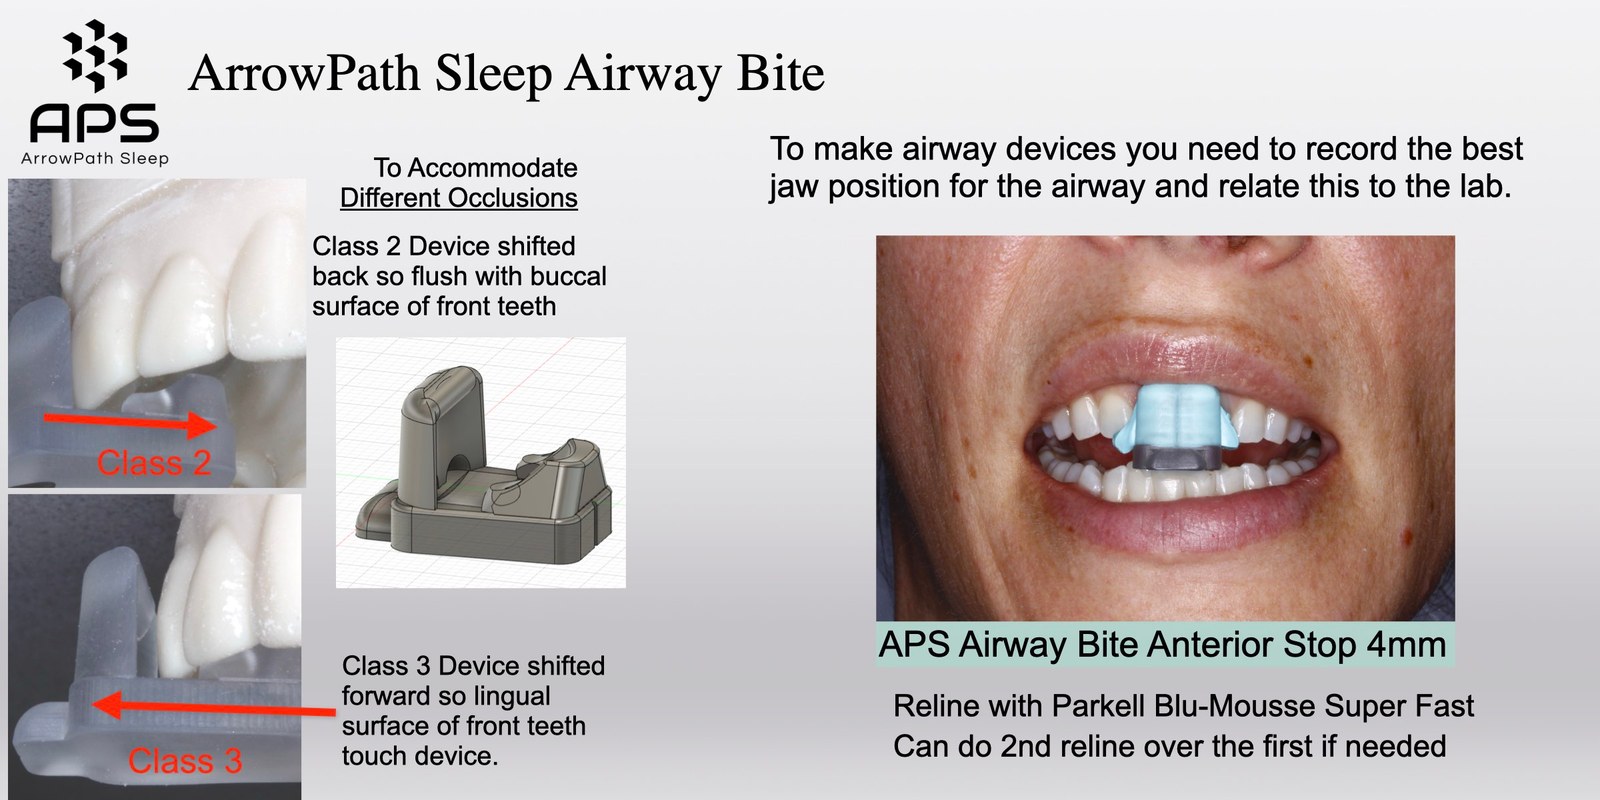
Class II
Device shifted back so it sits flush with the buccal surface of the front teeth.
Class III
Device shifted forward so the lingual surface of the front teeth touches the device.
Phase one
Fit the device
 Enlarge
Trial and positioning
Try the device in the mouth. Adjust forward for a Class III bite or backward for a Class II bite. Once positioned, note the orientation.
Silicone application
Fill the device with Parkell Blu-Mousse Super Fast silicone. A second reline can be performed over the first if needed.
Phase two
Map the range of movement
 Enlarge
Jaw movement assessment
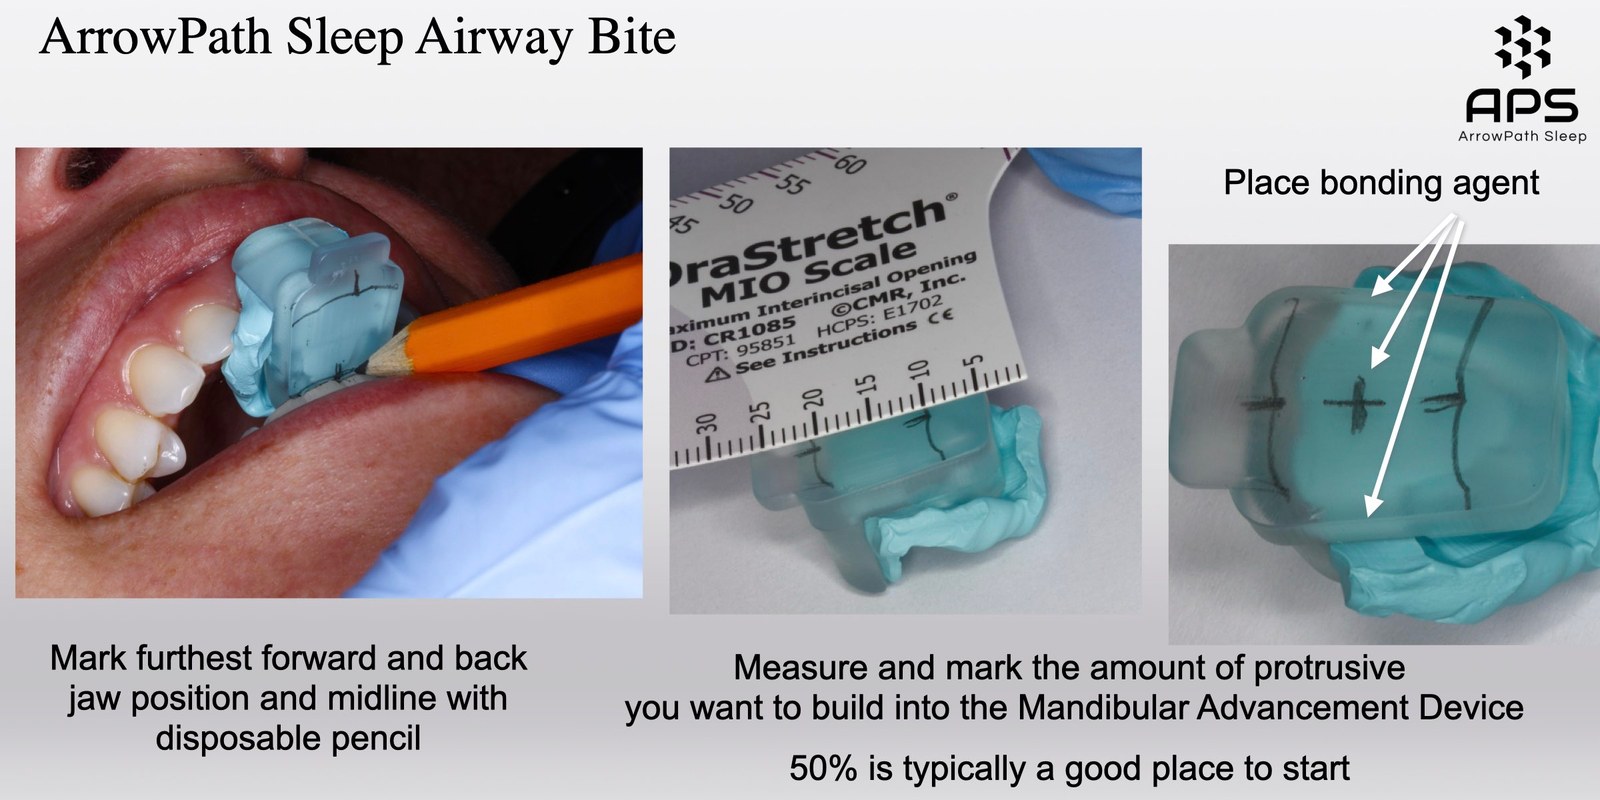
With the device affixed to the upper teeth, have the patient move their jaw as far back as possible. Mark the position of the lower incisor and the midline with a disposable pencil. Repeat with the jaw moved as far forward as possible.
Measurement
Remove the device from the mouth and measure the total anterior–posterior movement. Typically this is around 10–12 mm.
Target position marking
Mark a point halfway between the most retruded and most protruded positions. This is the target position for jaw posture — roughly 50% of total movement is typically a good place to start.
Phase three
Lock in the position
 Enlarge
Patient tapping
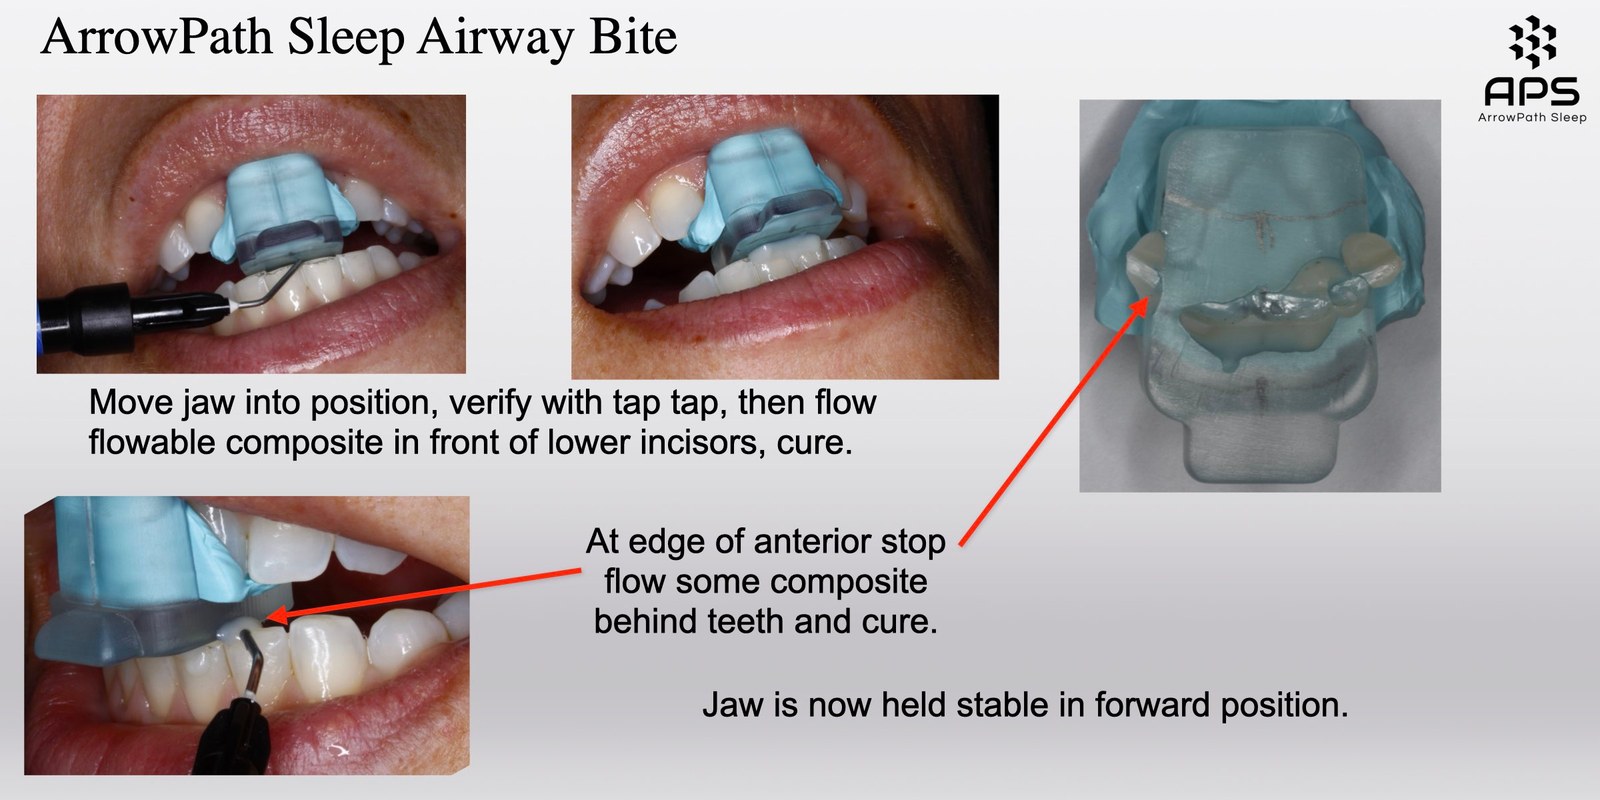
Instruct the patient to repeatedly tap their teeth on the airway bite, guiding them to tap at the midway forward mark.
Flowable composite application
Once you are satisfied with the forward arcing position of the lower jaw, have the patient rest and hold there. Verify it is in the area you marked with the pencil. Apply flowable composite to the airway bite in front of and behind the lower incisors, then cure. This holds the jaw in the desired forward position.
Phase four
Capture and send to the lab
 Enlarge
Digital scan
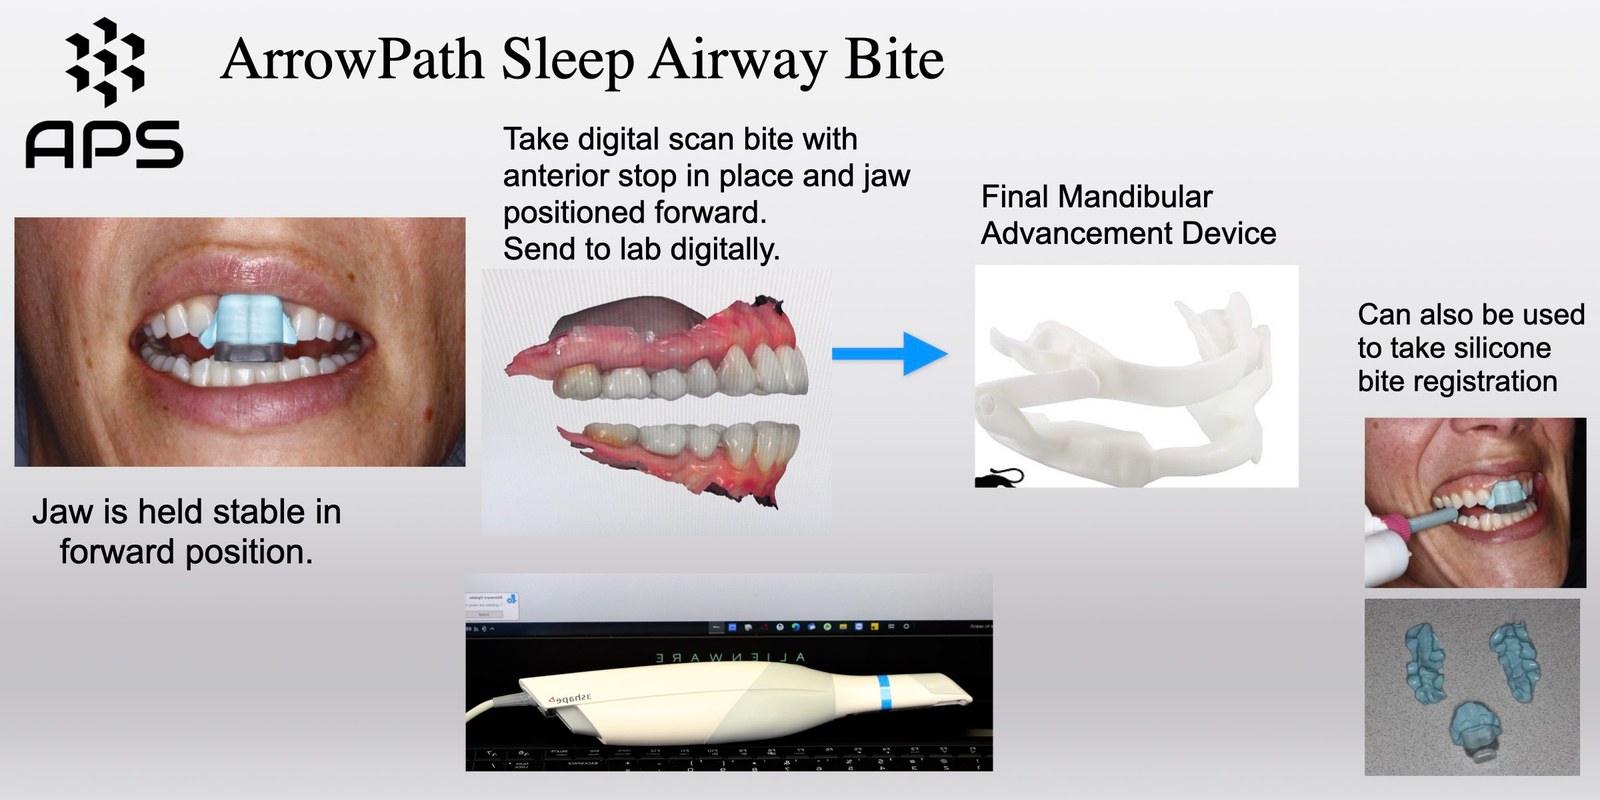
With the jaw held in the forward position, perform a digital scan of the bite. This aligns the upper and lower arch models so the dental lab can fabricate the sleep device.
Alternative: silicone bite
If not using a digital scanner, a silicone bite can be created by squirting silicone into the back of the device.
Ordering
The ArrowPath Sleep Airway Bite is available from Great Lakes Dental.
greatlakesdentaltech.com